3D Printed Architectural Building Sand Model
Introduction
Traditional architectural models take weeks.
They require skilled craftspeople and expensive materials.
What if you could get a physical model in days?
What if it matched your digital file perfectly?
That is exactly what a 3D Printed Architectural Building Sand Model offers.
This guide explains everything.
How it works, why it is useful, and when to choose it.
Let us begin.
What Is a 3D Printed Architectural Building Sand Model?
It is a physical replica of a building.
Made using a 3D printer, not handcrafted.
A 3D Printed Architectural Building Sand Model starts from your CAD or BIM file.
The printer builds it layer by layer.
The “sand” in the name refers to the material.
Many industrial printers use a gypsum‑based powder.
This powder feels like fine sand.
The finished model is white or light grey.
It has a matte, slightly rough texture.
Perfect for design reviews and early client presentations.
Why Choose 3D Printing Over Handcrafted Models?
Handcrafted models are beautiful.
But they are slow and expensive.
A 3D Printed Architectural Building Sand Model offers three big advantages.
Speed – A complex building can print overnight.
Accuracy – Every dimension matches your digital file exactly. No human error.
Repeatability – Print the same model twice, or print five design variations.
If your design changes, just update the file and print again.
No wasted labor, no arguments with model makers.
Key Features of a 3D Printed Sand Model
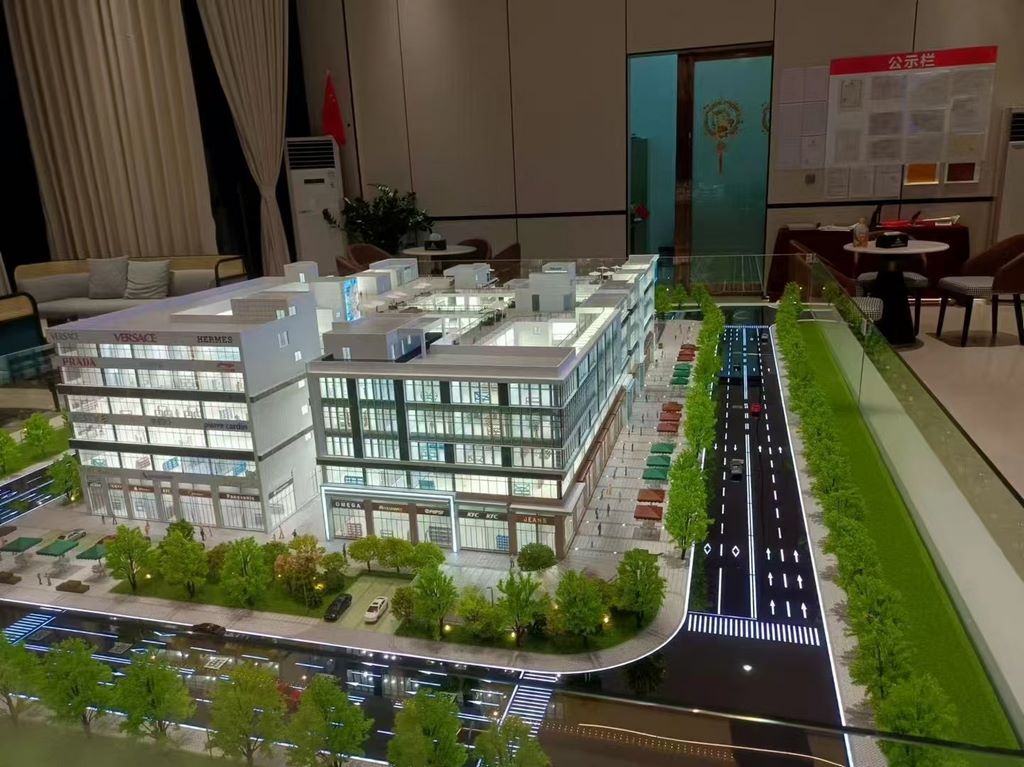
Let us break down what makes this method unique.
High Geometric Precision
The printer follows your CAD file exactly.
Curved walls, twisted towers, complex atriums – all print correctly.
Consistent Scale
No shrinkage or warping.
What you see on screen is what you get in your hand.
Sand‑Like Texture
Gypsum powder creates a matte, slightly rough surface.
It looks and feels like fine sand.
Hence the name 3D Printed Architectural Building Sand Model.
Monochrome White Finish
Most prints are white or light grey.
Perfect for studying massing, shadows, and proportions.
You can paint them later if needed.
Hollow or Solid Options
Print solid for durability.
Print hollow to save material and cost.
How 3D Printing Compares to Traditional Sand Table Models
Traditional sand table models are made by hand.
Laser‑cut acrylic, glued wood, painted details.
A 3D Printed Architectural Building Sand Model replaces most of that.
No laser cutting.
No gluing dozens of parts.
No hand painting.
The printer does the assembly.
However, traditional models win on material variety.
They use clear acrylic for glass, colored sand for grass, and resin for water.
3D printed models are usually one material, one color.
So when to use which?
Use 3D printing for design reviews, quick iterations, and internal studies.
Use traditional for final sales displays and luxury presentations.
The 3D Printing Process: Step by Step
Here is how a 3D Printed Architectural Building Sand Model is made.
Step 1: Prepare the Digital File
Start with a clean CAD or BIM model.
Remove tiny details like window mullions (they may not print well).
Ensure the model is watertight (no holes in the mesh).
Export as STL or OBJ.
Step 2: Choose the Printer and Material
Two common technologies:
Binder jetting – Uses gypsum powder and a liquid binder. Produces sand‑like texture. Best for architectural models.
FDM – Uses plastic filament. Faster but less sand‑like.
For a true sand feel, binder jetting is the right choice.
Step 3: Slice and Print
The software slices the model into thin layers.
The printer spreads a layer of powder.
A print head deposits binder where the model should be.
Layer by layer, the model grows.
A 20 cm tall building takes 6 to 12 hours.
Step 4: Post‑Processing
After printing, the model is surrounded by loose powder.
Brush away the excess powder carefully.
Apply a clear infiltrant (like super glue or wax) to strengthen the model.
Let it cure for a few hours.
Step 5: Optional Finishing
You can leave it white for design reviews.
Or paint it, add a base, and attach simple landscaping.
That is it. A 3D Printed Architectural Building Sand Model ready in 1 to 2 days.
Benefits for Architects and Developers
Who benefits most from 3D printed sand models?
Rapid Prototyping
Test five design options in one week.
Print each overnight.
Review them together the next morning.
Design Review Clarity
Pass a physical model around the meeting table.
Everyone sees the same thing at the same time.
Catch massing and proportion errors early.
Client Communication
Clients love holding a model of their future building.
Even a simple white model builds trust and excitement.
Educational Tools
Architecture schools use 3D printed models for student projects.
Cheap, fast, and repeatable.
Multiple Identical Copies
Need three models for three different teams?
Print them simultaneously.
A 3D Printed Architectural Building Sand Model is a productivity tool, not just a display piece.
Cost and Time Breakdown
3D printing is very cost‑effective compared to handcrafted models.
Small model (10 cm tall, simple shape) – 50, 2–4 hours.
Medium model (20 cm tall, moderate detail) – 200, 6–12 hours.
Large model (40 cm tall, complex geometry) – 800, 24–48 hours.
Professional printing services charge by volume and material.
In‑house printers have lower per‑model costs after the initial investment (10,000 for a binder jetting printer).
Compare that to a handcrafted sand model at 10,000.
For design iterations, 3D printing wins on cost and speed.
Case Study: 3D Printed Model Cuts Review Time by 70%
An architecture firm in Chicago designed a museum with a twisted form.
They needed to study the facade’s shadow impact at different times of day.
They printed a 3D Printed Architectural Building Sand Model at 1:200 scale.
The printer ran overnight.
The next morning, the team gathered around the model.
They rotated it under a desk lamp to simulate sun angles.
Within two hours, they identified three problematic facades.
Changes were made in CAD that afternoon.
A new model was printed the next night.
The entire review cycle – from design change to physical validation – took 48 hours.
Previously, handcrafted models took two weeks per iteration.
The 3D printing method saved 70% of review time and thousands of dollars.
Limitations of 3D Printed Sand Models
No technology is perfect.
Know the limits before you commit.
Fragility
Binder‑jetted gypsum models are brittle.
They can break if dropped.
Handle with care, especially thin parts like railings.
Single Material
You cannot print clear windows or colored grass.
Everything is one color (usually white).
For colorful sales models, traditional methods are better.
Surface Roughness
The sand‑like texture is not smooth.
Fine details like window frames may appear blurry.
For very fine details, resin 3D printing is better.
Size Limits
Most printers have a build volume of 20–40 cm per side.
Larger models must be printed in pieces and glued together.
Despite these limits, a 3D Printed Architectural Building Sand Model is excellent for early‑stage design and internal reviews.
How to Choose Between 3D Printing and Traditional Methods
Use this simple rule.
Design review, massing studies, quick iterations → 3D printing.
Final sales display, luxury presentations, colorful landscaping → Traditional handcrafted.
Many firms do both.
Print a white 3D model for internal reviews.
Then commission a handcrafted model for the sales gallery.
Maintaining Your 3D Printed Sand Model
These models are fragile.
Follow these care tips.
Handle with clean, dry hands – Oils and moisture weaken the gypsum.
Store in a closed display case – Dust is hard to remove without breaking details.
Clean with compressed air at low pressure – Never use water or wet cloths.
Apply a clear acrylic spray – This strengthens the model and makes it less brittle.
Repair breaks with super glue – Apply carefully with a toothpick.
A well‑protected 3D Printed Architectural Building Sand Model can last for years if kept in a case.
Common Mistakes to Avoid
Do not try to print extremely fine details.
Window mullions thinner than 0.5 mm will break.
Do not skip the infiltrant step.
Unsealed gypsum models crumble over time.
Do not use 3D printing for final client presentations without finishing.
The raw sand‑like texture looks unfinished to non‑architects.
Do not overload the printer with too many parts at once.
Print failures waste time and material.
Do not forget to check the scale before printing.
A model that is too small loses all detail.
Related Architectural Model Types
While 3D printing is powerful, other model types serve different purposes.
An Architectural Sand Table Model is the traditional handcrafted version. It uses real sand, acrylic, and painted details. It takes weeks but looks beautiful and colorful – perfect for sales centers.
A Miniature Architectural Scale Model is a small, often white model used for design reviews. 3D printing is an excellent way to produce these quickly. In fact, many miniature models are now 3D printed.
A Modern Architectural Scale Model is typically white or monochrome with clean lines, similar to 3D printed models, but made by hand with laser‑cut acrylic. It has a smoother finish than gypsum prints.
For high‑end residential projects, a Luxury Villa Sand Table Model is handcrafted with realistic pool resin, miniature trees, and detailed landscaping. 3D printing cannot match that level of realism.
Finally, for shopping mall projects, a Commercial Mall Architectural Scale Model requires transparent roofs and removable sections to show interior store layouts. 3D printing is not ideal for that due to material limits.
Each method has its place. 3D printing excels at speed and iteration. Traditional methods excel at beauty and material variety.
Future Trends in 3D Printed Architectural Models
The technology is evolving fast.
Multi‑material printing – Print glass, metal, and sand in one model.
Full‑color sand printing – Gypsum models can now be printed in color, no painting needed.
Larger printers – Build volumes of 1 meter or more are becoming affordable.
Faster print speeds – What takes 12 hours today may take 1 hour in five years.
These advances will blur the line between 3D printing and traditional model making.
Conclusion
A 3D Printed Architectural Building Sand Model is a game changer for design reviews.
It is fast, accurate, and affordable.
Use it to test multiple design options.
Use it to catch massing errors early.
Use it to communicate with clients before investing in a final handcrafted model.
The technology is mature and accessible.
Many online services will print your file and ship the model to you.
Start with a simple test print.
Then integrate 3D printing into your design workflow.
Your team will review faster.
Your clients will understand better.
Your projects will improve.
And remember – whether you need a traditional Architectural Sand Table Model for a sales gallery, a Miniature Architectural Scale Model for quick internal reviews, a Modern Architectural Scale Model for a contemporary pitch, a Luxury Villa Sand Table Model for wealthy buyers, or a Commercial Mall Architectural Scale Model for retail projects, 3D printing can be the first step. Print a quick study model, then commission the final version.


