Simulation of industrial micro device model making can be used for teaching or presentation
1、 Production process flow
Preliminary design: Plan the model size according to a 1:10 scale (referring to the actual equipment length, width, and height), draw structural drawings, and clarify the layout of core components such as the equipment body, operation panel, display screen, and warning lights.
Structure construction: Cut the base with environmentally friendly density board, laser engrave acrylic board to make the equipment shell (white body+red decorative strip), and use ABS plastic rods to build the mechanical arm, conveyor belt and other detailed components inside to ensure consistency with the real equipment structure.
Core component production:
Equipment body: The outer shell is made of white matte painted metal plate, and the surface is treated with matte to simulate industrial texture; The top red warning light is 3D printed with ABS plastic and equipped with miniature LED beads to simulate the warning effect.
Operation panel: black acrylic cutting display screen with built-in LED lights to simulate screen display; The control panel is 3D printed with aluminum alloy material, equipped with knobs and emergency stop buttons.
2、 Material selection and characteristics
Main materials: environmentally friendly density board (base), ABS plastic (mechanical arm, conveyor belt bracket), aluminum alloy (equipment frame).
Surface materials: white matte baking paint (equipment casing), black acrylic board (display screen), gray epoxy resin (floor).
Auxiliary materials: Silver metal plate laser engraved with the "SEAMARK XB5100" logo, black acrylic plate for brand logo production.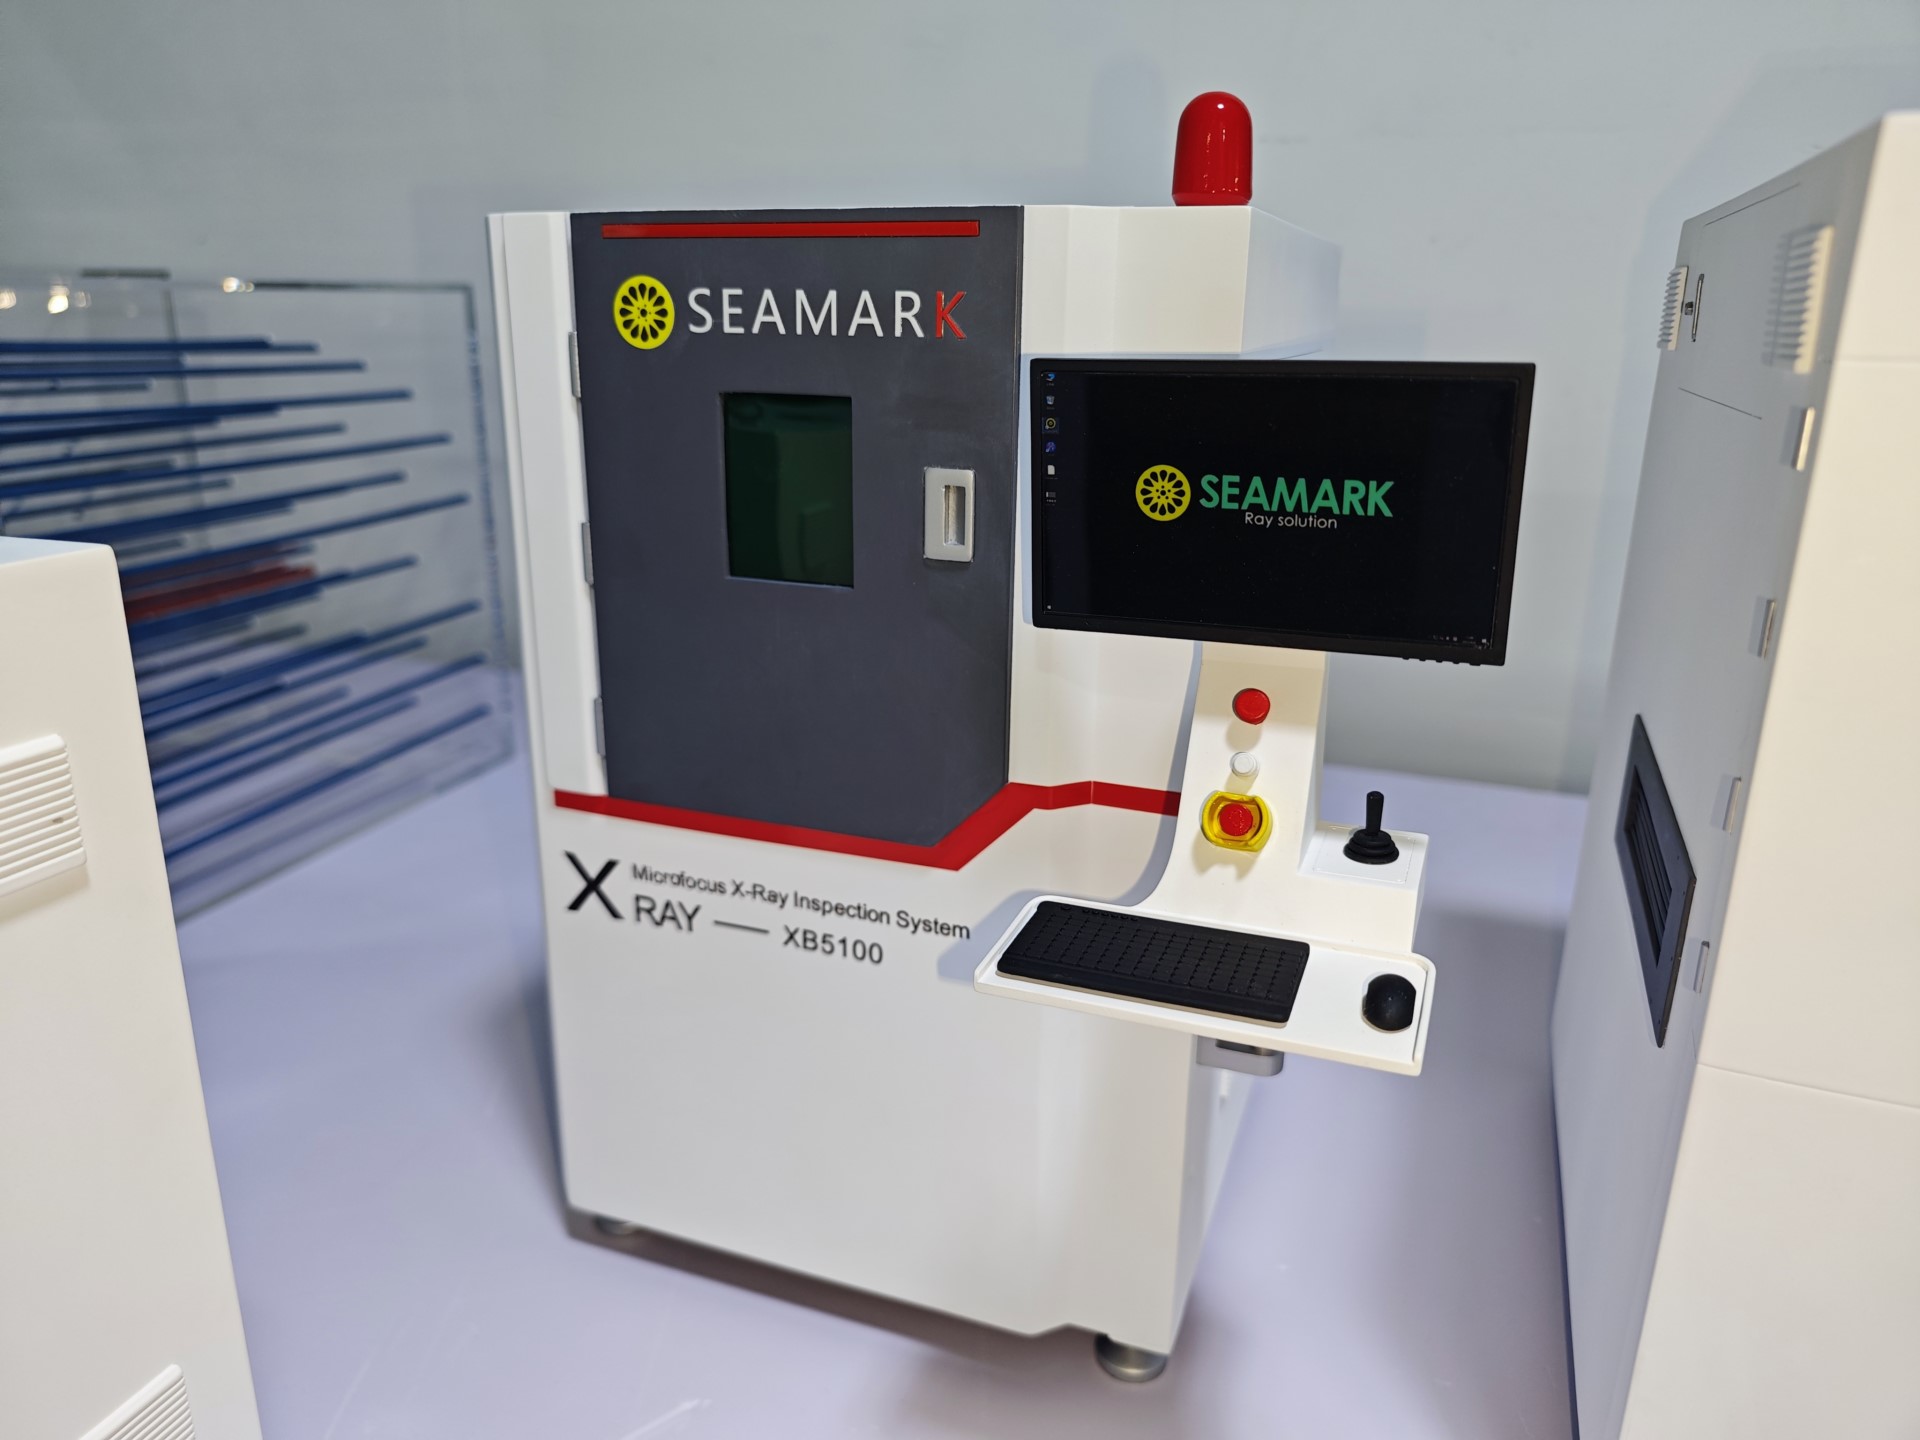
3、 Post processing and coloring techniques
Surface polishing and base color treatment:
Rough grinding: Polish the density board base with 80 grit sandpaper to remove burrs;
Fine grinding: Use 240 grit sandpaper to polish the equipment casing, ensuring a smooth surface;
Base color spraying: Apply white matte paint evenly to the main body of the equipment, treat the ground with gray matte paint, and lightly grind the edges with 400 grit sandpaper after drying.
Detail coloring and texture simulation:
Equipment identification: Hand drawn interface numbers in black acrylic paint (such as "Interface 1-6"), ground warning lines in yellow paint, and safety signs in white paint (such as "Beware of Electric Shock").
Material simulation: The conveyor belt is mixed with gray acrylic pigment and a small amount of black simulated rubber texture, and the joints of the robotic arm are enhanced with silver metallic paint to enhance the metallic luster.
Assembly and debugging:
Component splicing: The ABS plastic rod is fixed to the equipment frame with hot melt adhesive, and there is reserved space for movement at the joint of the robotic arm;
Light source test: LED lights have moderate brightness after being connected to electricity, and the display screen has uniform light transmission;
Overall calibration: Adjust the equipment spacing to match the actual equipment, ensuring visual proportion coordination.


