Large industrial equipment model making Transformer model Enterprise model customizable
Transformer model production case: full process restoration from design to finished product
1、 Design positioning and prototype analysis
Based on the actual power transformer used in the factory, restore its core structure and industrial texture. The prototype includes a gray metal shell, a black insulation sleeve at the top, side heat sinks, and warning signs. The overall color scheme is mainly gray, black, and silver, with metallic luster and industrial details. During production, it is necessary to focus on restoring the proportion relationship, structural hierarchy, and metallic texture of the equipment to ensure a 90% restoration degree.
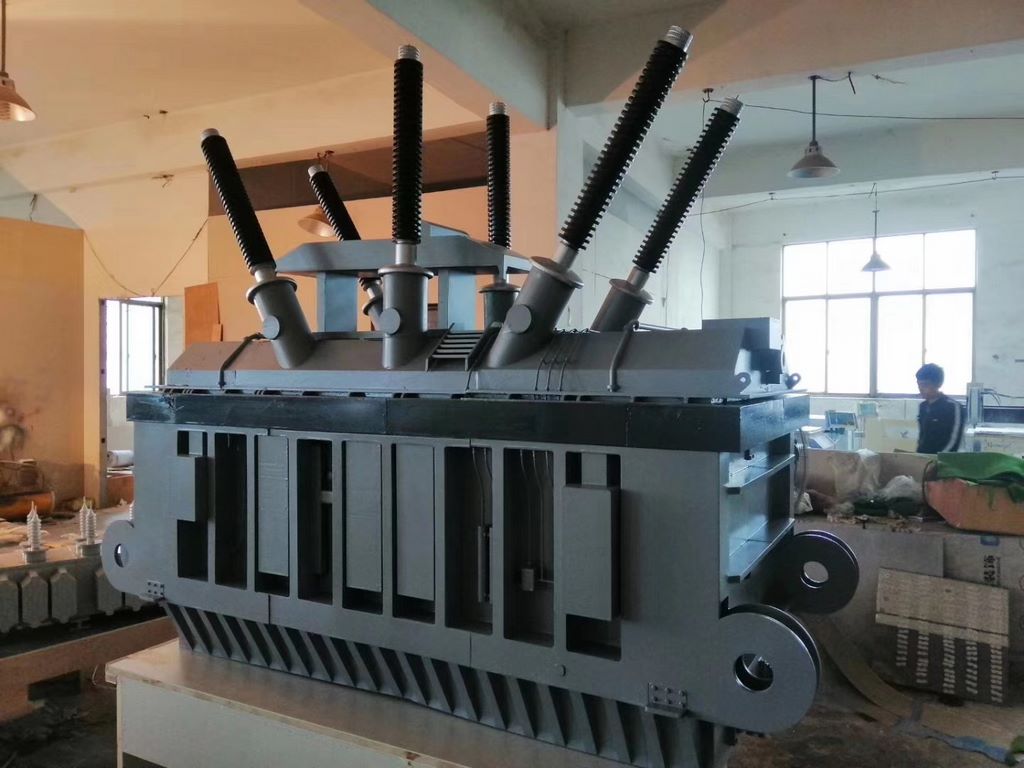
2、 Material selection and pretreatment
Main structural materials
Shell and Base: Use 1.5mm thick gray ABS plastic board (simulating a metal shell), laser cut the main frame, heat sink, and base components, and then use 800 grit sandpaper to polish the edges and remove burrs after cutting.
Insulation sleeve: made of black PVC pipe (diameter 5cm, height 10cm), cut and slightly heated with a hot air gun to bend into a top arc shape, and sprayed with matte black paint to simulate insulation material on the surface.
Heat dissipation fins: 0.8mm thick aluminum plate is selected, and parallel arranged heat dissipation fins (with a spacing of 2cm) are made by stamping process, and welded and fixed on the side of the main body.
Detail Decoration Materials
Warning sign: Use a 0.3mm thick brass plate laser engraved with words such as "High Voltage Danger" and "XX Factory", welded to the front of the shell, and gold-plated on the surface.
Connecting components: Use silver metal wire (diameter 0.5mm) to simulate cable connection, and fix it at the bottom of the sleeve with hot melt adhesive.
3、 Manufacturing process and assembly flow
Main structure construction
Shell frame: ABS plastic boards are spliced to form columns and beams, fixed with wood glue, and reinforced internally with fine wooden strips to ensure a verticality error of ≤ 2 °.
Heat sink installation: Aluminum heat sinks are fixed to the side of the main body with screws, evenly spaced, and bolt holes are marked with silver paint.
Top casing and detail treatment
Sleeve fixation: The black PVC pipe is welded to the top through a bracket, with the height and spacing strictly following the prototype. The interface is sealed with hot melt adhesive, and the outer layer is wrapped with silver tape to simulate a metal interface.
Warning sign installation: The brass plate sign is welded to the front of the shell, with a gold-plated surface and wear marks painted with black paint on the edges.
Overall fixation and base treatment
All components are fixed to a dark gray wooden base with wood glue and screws. The edges of the base are wrapped in wood veneer and coated with varnish on the surface.
4、 Coloring and texture restoration
Base color spraying
Main body shell: Apply 2-3 thin layers of gray acrylic pigment (with a small amount of titanium dioxide to enhance brightness), and lightly polish with 400 grit sandpaper after each layer is dry.
Heat sink: Silver metallic paint (diluted 50%) thinly coated with 2 layers, simulating an oxide layer; The bolt holes are marked with silver paint and the edges are dyed with black paint.
Detail aging and metallic texture
Insulation sleeve: After the black background is dry, use white paint to spot the stains, and then use silver paint to draw the metal reflection at the joint.
Metal parts: After being covered with silver paint, use a fine bristled pen dipped in black pigment to draw wear marks.
Lighting and Atmosphere Creation
A warm yellow LED strip is installed on the inside of the base, connected to an external switch through wires. The light shines through the gaps of the heat sink, illuminating the gray shell and creating a contrast between light and dark.


